[vc_row][vc_column][vc_column_text]
Create Facebook 3D Photos with Mettle’s Flux Volumetric VFX plugin for Adobe After Effects and Premiere Pro
[/vc_column_text][/vc_column][/vc_row][vc_row][vc_column width=”1/2″][vc_column_text]Facebook’s 3D Photos use the DepthMaps that are stored with “Portrait” photos taken on iPhone 7+, 8+, X or XS but in this tutorial, Rick Markley of Aspect Multimedia will walk you through the process to create a Facebook 3D photo with Mettle’s FLUX a volumetric fractal plugin for Adobe’s After Effects and Premiere Pro.
The depth of the DepthMap is a grayscale image where the foreground is 100% black, mid ground is 50% grey, and the background is white.
What you’ll need (links at the end of the tutorial).
- Mettle’s Flux plugin.
- Adobe After Effects or Premiere Pro.
- DepthCam for iOS – a $3.99 Depth Editor for iOS.
- For editing the DepthMap an iPhone capable of running DepthCam (check DepthCam for compatibility).
- Adobe Photoshop (this is not a requirement but part of my process).
- For publishing to Facebook as a 3D Photo An iPhone 7+, 8+, X or XS.
You can combine the RGB image and the Depth into a Portrait image with other iPhones but you’ll need a 7+, 8+, X or XS in order to upload it to Facebook.
This tutorial assumes you have a basic understanding of Mettle’s Flux. For more information and a free demo of Flux, please visit Mettle’s website
I’m using After Effects for this demo, but you could also use Premiere Pro (the process is slightly different).[/vc_column_text][/vc_column][vc_column width=”1/2″][vc_raw_html]JTNDaWZyYW1lJTIwc3JjJTNEJTIyaHR0cHMlM0ElMkYlMkZ3d3cuZmFjZWJvb2suY29tJTJGcGx1Z2lucyUyRnBvc3QucGhwJTNGaHJlZiUzRGh0dHBzJTI1M0ElMjUyRiUyNTJGd3d3LmZhY2Vib29rLmNvbSUyNTJGbWV0dGxlLm1vbnRyZWFsJTI1MkZwb3N0cyUyNTJGMjMyOTE4ODcxMDQ0NDAzOCUyNndpZHRoJTNENTAwJTI2c2hvd190ZXh0JTNEZmFsc2UlMjZoZWlnaHQlM0Q5MDMlMjZhcHBJZCUyMiUyMHdpZHRoJTNEJTIyNTAwJTIyJTIwaGVpZ2h0JTNEJTIyOTAzJTIyJTIwc3R5bGUlM0QlMjJib3JkZXIlM0Fub25lJTNCb3ZlcmZsb3clM0FoaWRkZW4lMjIlMjBzY3JvbGxpbmclM0QlMjJubyUyMiUyMGZyYW1lYm9yZGVyJTNEJTIyMCUyMiUyMGFsbG93VHJhbnNwYXJlbmN5JTNEJTIydHJ1ZSUyMiUyMGFsbG93JTNEJTIyZW5jcnlwdGVkLW1lZGlhJTIyJTNFJTNDJTJGaWZyYW1lJTNF[/vc_raw_html][/vc_column][/vc_row][vc_row][vc_column][vc_separator][/vc_column][/vc_row][vc_row][vc_column width=”1/2″][vc_column_text]Step 01: Create a Flux composition in After Effects.
- Create a New Composition that is either 800 px x 1200 px or 1200 px x 800 px.
- Since this is a still photo you’ll only need one frame.
- Create a new Solid layer for a background (I chose a black background for this project).
- Create a new Solid layer for the Flux layer.
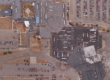
- Add the Flux plugin to the Flux layer and experiment until you’re happy with the results. (See Fig. 1a)
[/vc_column_text][/vc_column][vc_column width=”1/2″][vc_single_image image=”1061″ img_size=”full” add_caption=”yes” alignment=”center” onclick=”link_image”][/vc_column][/vc_row][vc_row][vc_column width=”1/2″][vc_column_text]Step 02: Create Two .PSD Files (an RGB Image and a DepthMap)
- By default Flux’s Render Mode is set to “Normal”. Save an RGB.psd file by clicking Composition > Save Frame As > File (See Fig. 1b)
- Change Flux’s Render Mode to “Depth”, adjust the Depth settings (See Fig. 1c)
- Then save grayscale DepthMap.psd file by clicking Composition > Save Frame As > File (See Fig. 1d)
[/vc_column_text][/vc_column][vc_column width=”1/2″][vc_row_inner][vc_column_inner width=”1/2″][vc_single_image image=”1065″ img_size=”medium” add_caption=”yes” alignment=”center” onclick=”link_image”][/vc_column_inner][vc_column_inner width=”1/2″][vc_single_image image=”1066″ img_size=”full” add_caption=”yes” alignment=”center” onclick=”link_image”][/vc_column_inner][/vc_row_inner][/vc_column][/vc_row][vc_row][vc_column width=”1/2″][vc_column_text]Step 03: Open the RGB and DepthMap .PSDs file with Photoshop and output JPGs.
- Ensure PSD project is either 1200 px x 800 px or 800 px x 1200 px.
- Save as .JPG files. To help keep organized I labeled my files “filename_rgb.jpg” and “filename_depth.jpg”.
Tip: Try experimenting with combining layers and adjusting levels to enhance the effect of the DepthMap.[/vc_column_text][/vc_column][vc_column width=”1/2″][/vc_column][/vc_row][vc_row][vc_column width=”1/2″][vc_column_text]Step 04: Airdrop the two images onto an iPhone.
- Airdrop is a feature of Mac OS for transferring content between devices. If you’re not on a Mac you’ll need to explore options for adding images to your iPhones Camera Roll.
[/vc_column_text][/vc_column][vc_column width=”1/2″][/vc_column][/vc_row][vc_row][vc_column width=”1/2″][vc_column_text]Step 05: Open DepthCam and import the RGB color image.
- Open DepthCam and import the RGB color image. (See Fig. 5a)
[/vc_column_text][/vc_column][vc_column width=”1/2″][vc_single_image image=”1069″ img_size=”medium” add_caption=”yes” alignment=”center” onclick=”link_image”][/vc_column][/vc_row][vc_row][vc_column width=”1/2″][vc_column_text]Step 06: Import DepthMap
- Click “Import DepthMap” and select the DepthMap image, (See Fig. 6a)
- Once the DepthMap is imported you’ll see a stacked image with the RGB color version on the top and the grayscale DepthMap on the bottom. (See Fig. 6b)
[/vc_column_text][/vc_column][vc_column width=”1/2″][vc_row_inner][vc_column_inner width=”1/2″][vc_single_image image=”1075″ img_size=”medium” add_caption=”yes” alignment=”center” onclick=”link_image”][/vc_column_inner][vc_column_inner width=”1/2″][vc_single_image image=”1076″ img_size=”medium” add_caption=”yes” alignment=”center” onclick=”link_image”][/vc_column_inner][/vc_row_inner][/vc_column][/vc_row][vc_row][vc_column width=”1/2″][vc_column_text]Step 07: Save the “Portrait” mode image to your Camera Roll.
- Click the save icon. (See Fig 7a).
[/vc_column_text][/vc_column][vc_column width=”1/2″][vc_single_image image=”1072″ img_size=”medium” add_caption=”yes” alignment=”center” onclick=”link_image”][/vc_column][/vc_row][vc_row][vc_column width=”1/2″][vc_column_text]Step 08: Post the 3D Photo to Facebook with the Facebook app. You’ll need an iPhone 7+, 8+, X or XS/
- Start by creating a Facebook post.
- Tap the icon with three dots to see all post options
- Tap ‘3D Photo’ to open the iPhone ‘Portraits’ folder.
- Choose the photo you would like to share and preview in 3D.
- Add a caption. hit ’Share’ and see your 3D photo come to life in the News Feed and VR.
Once the 3D photo on Facebook where you can scroll, pan and tilt to see the photo in realistic 3D.[/vc_column_text][/vc_column][vc_column width=”1/2″][/vc_column][/vc_row][vc_row][vc_column][vc_separator][/vc_column][/vc_row][vc_row][vc_column width=”1/2″][vc_column_text]Notes and Tips:
- The resulting “Portrait” Image must be either 800 px x 1200 px or 1200 px x 800 px or it will not work.
- You’ll get more of the 3D effect when your image has high contrasting colors.
- Experiment with combining photoshop layers to enhance the DepthMap.
- You can also view 3D photos in VR using the Oculus Browser on Oculus Go or Firefox on Oculus Rift. Once the post is loaded into the browser just click “Enter VR”. (See Fig. 8a)
[/vc_column_text][vc_column_text]Useful Links
DepthCam[/vc_column_text][/vc_column][vc_column width=”1/2″][vc_single_image image=”1082″ img_size=”large” add_caption=”yes” alignment=”center” onclick=”zoom”][/vc_column][/vc_row]